Comparison of Two Commonly Used AI Visualization Interactive Applications:
Gradio Gradio’s main strength is its ease of use. It features a simpler code structure compared to Streamlit. By just defining input and output interfaces, you can quickly build simple interactive web pages, making model deployment easier. This is well-suited for developers working on relatively straightforward projects who aim to deploy applications rapidly. Sharing is convenient: When launching an application, setting the share=True parameter generates a public link, allowing direct sharing with users, even via platforms like WeChat. Debugging is also facilitated because Gradio can render the interface directly within a Jupyter notebook, simplifying the debugging process.
Streamlit Streamlit’s key advantage lies in its scalability. It is more complex than Gradio and requires a significant time investment to master fully. With Streamlit, you can use Python to create complete interactive applications encompassing both front-end and back-end functionality. This makes it suitable for developers dealing with more complex scenarios who wish to construct rich and diverse interactive pages.
Gradio Official Website Link: https://gradio.app/
Quick start with the Python third-party library Gradio, current version V3.27.0
Python version requirement: 3.7 or higher
pip install gradio#For faster installation, you can use the Tsinghua mirror source
pip install -i https://pypi.tuna.tsinghua.edu.cn/simple gradio
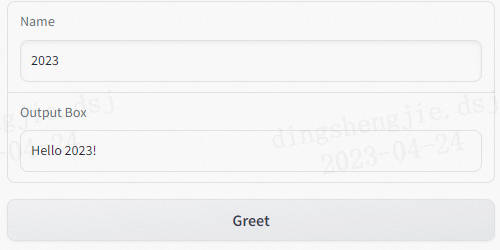
After installation, launch quickly directly in the IDE,
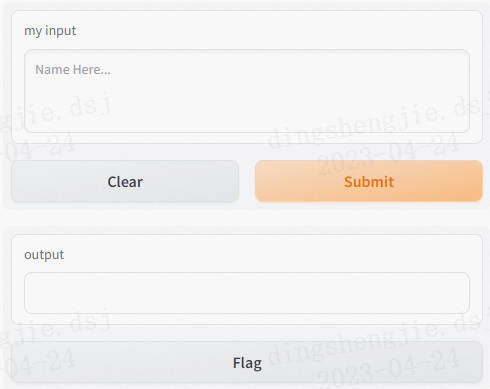
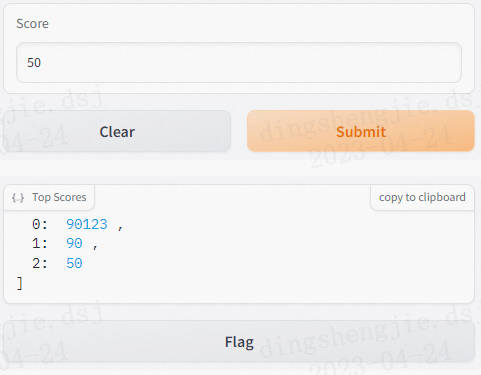
After running the program, open http://localhost:7860 to see the web page effect. The left is the text input box, and the right is the result display box. The Clear button is used to reset the web page state, the Submit button is used to execute the processing program, and the Flag button is used to save the results to the local machine.
Open the browser to use it.

When developing locally, if you want to run your code as a Python script, you can use the Gradio CLI to launch the application in reload mode, which will provide seamless and fast development.
Note: You can also do python app.py, but it will not provide an automatic reload mechanism.
Gradio can wrap nearly any Python function into a user-friendly interface. As seen in the example above, it handles a simple text-based function. However, this function can also manage various data types.
The Interface class is initialized using the following three parameters:
fn: the function to be wrapped
inputs: the type of input component, (e.g., “text”, “image”)
outputs: the type of output component, (e.g., “text”, “image”)
With these parameters, you can quickly create and publish interfaces.
Commonly used basic modules include:
Application interfaces: gr.Interface (for simple scenarios), gr.Blocks((for customized scenarios)
Input/Output: gr.Image(image), gr.Textbox(text box), gr.DataFrame(data frame), gr.Dropdown(drop-down options), gr.Number(number), gr.Markdown, gr.Files
Control components: gr.Button(button)
Layout components: gr.Tab(tab), gr.Row(row layout), gr.Column(column layout)
Interface.launch() method returns three values:
app: a FastAPI application that supports the Gradio demo
local_url: local address
share_url: public address, generated when share=True
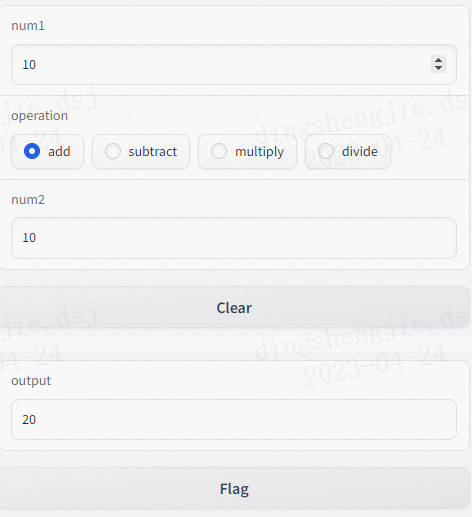
For complex programs, each component in the input list corresponds sequentially to a parameter of the function. Each component in the output list corresponds sequentially to a value returned by the function.
Each field in the inputs list corresponds sequentially to each parameter of the function, and the outputs follow the same pattern.
Gradio supports various component types, such as image, dataframe, and video. Usage examples are as follows:

When using the Image component as input, the function receives a numpy array with dimensions (w,h,3), arranged in RGB channel order. Note that the input image component includes an edit button, enabling cropping and zooming of the image. This image processing can help uncover biases or hidden defects in machine learning models. Additionally, the input component has a shape parameter that sets the input image size. The processing method scales the shortest side of the image to the specified length while maintaining the aspect ratio, then crops the longest side to the specified length using central cropping. For smaller images, it’s better not to set the shape, thus passing the original image directly. The input component Image can also set the input type, such as type=filepath to specify the path to the processed image. For more details, refer to the official documentation, which is very clear.
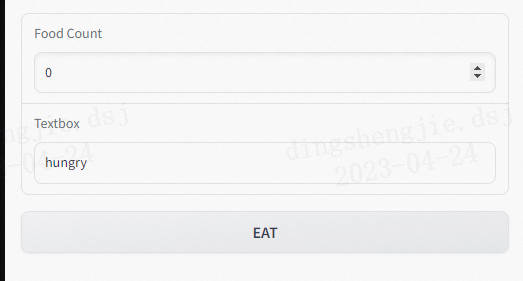
The benefit of using global variables is that they retain their value even after the function has finished executing. For instance, in machine learning, you can load a large model using a global variable, making it available within your function. This way, the model doesn’t need to be reloaded each time the function runs. The examples below illustrate the advantages of using global variables.
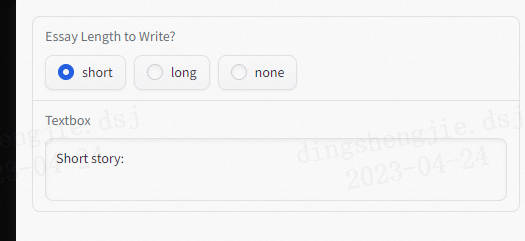
Gradio also supports session state as a way to persist data. With session state, data remains available across multiple submissions within the same page session. However, this data is isolated to the individual user and isn’t shared between different users interacting with your model. A common use case for session state is a chatbot, where you need to access a user’s previous inputs. Storing chat history in a global variable isn’t suitable because it would mix conversations from different users. Note that session state persists across submissions on the current page, but it doesn’t carry over if you open the demo in a new tab or refresh the page.
To utilize session state for storing data, follow these three steps:
Pass an additional parameter representing the interface state into your function.
At the end of your function, return the updated state value as an extra return value.
When defining inputs and outputs, include the state component.

By setting live=True in the Interface, the output will update in real-time as the input changes. In this mode, a submit button is unnecessary since inputs are submitted automatically.
Refers to the concept described in section 1.2.4
When dealing with inputs like real-time video or audio streams, data is continuously sent to the backend. For such scenarios, you can employ streaming mode to handle the data processing efficiently.
Compared to Interface, Blocks offers a lower-level API that grants you more control over the layout and data flow of your web applications. With Blocks, you can precisely position components on the page, manage intricate data flows (for example, allowing an output from one function to serve as an input to another), and dynamically update component properties based on user actions. Blocks allows for extensive customization of components, with detailed customization options available in the official documentation.
The Blocks approach utilizes the with statement to add components. If you don’t specify a layout, components will stack vertically in the order they are created within the application interface.

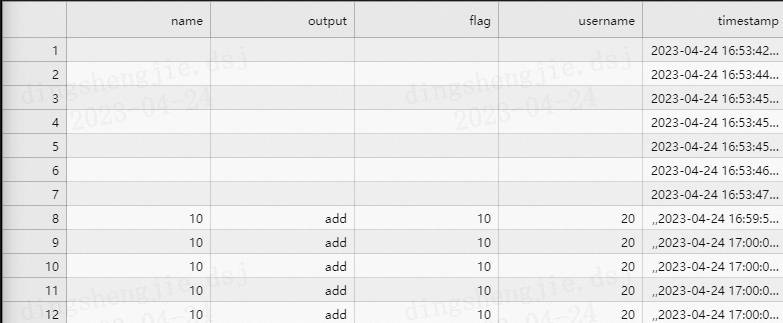
You might have noticed a “Flag” button beneath the output area. If a user testing your model encounters an input that produces an incorrect or unexpected result, they can flag that input to alert the developer. The location for these flagged inputs is set by the flagging_dir parameter of the Interface, defaulting to ‘flagged’. Erroneous inputs are saved to a CSV file. If your Interface handles file data, a separate folder is also created to store the flagged files.
Viewing the log.csv file would display its contents as follows:
Styling
For additional styling options, consult the Gradio official documentation. You can find examples by searching for .style attached to different components (e.g., image.style). This will provide examples on how to set style parameters for those components. For instance, the settings for styling an image component are documented as follows:
Queuing
If your function takes a long time to process, such as in object detection, or if your application experiences high traffic, use the queue() method to manage requests efficiently. This method leverages websockets to help prevent network timeouts. Implementation is as follows:
Generators
In scenarios where you wish to display a sequence of outputs rather than a single one, you can provide Gradio with a generator function instead of a standard function. This is particularly useful for processes like image generation, where you might want to show intermediate images leading to the final result. For example, a generator function could return one image every second.
By default, the content of input components can be edited, whereas output components are read-only. To make output components editable, set interactive=True.
You can set different events for different components, such as adding a change event to an input component. You can further check the official documentation to see what other events the components have.
If you want to handle multiple data streams, just set the corresponding input and output components.

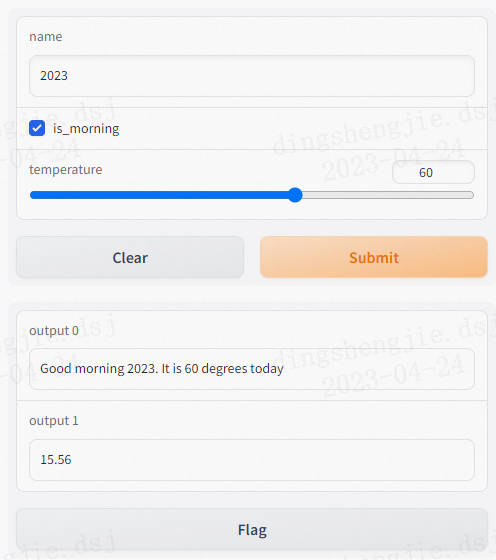
The following example shows how to handle multiple output values in the form of a list.
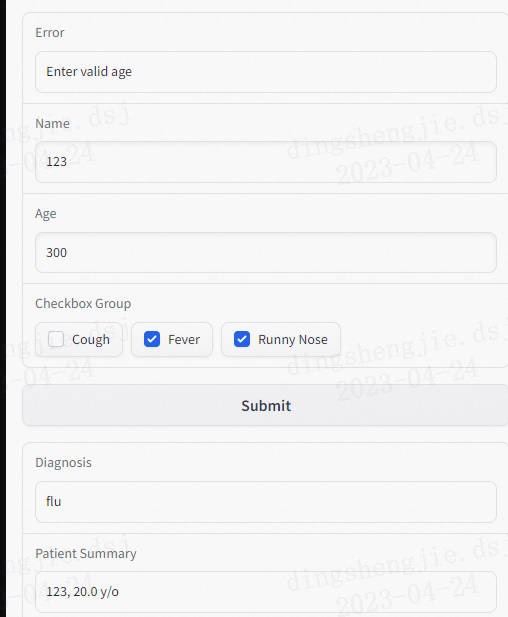
The following example shows how to handle multiple output values in the form of a dictionary.
The return value of an event listener function is usually the updated value of the corresponding output component. Sometimes, we also want to update the configuration of the component, such as visibility. In this case, we can update the configuration of the component by returning the update function.
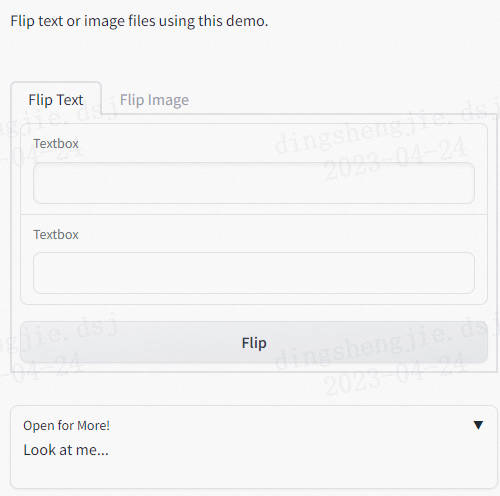
Blocks uses the flexbox model layout from HTML. By default, components are arranged vertically.
Using the Row function will arrange the components horizontally, but the components inside the Row function block will maintain the same height.
Components are usually arranged vertically. We can create different complex layouts using the Row and Column functions.
As shown below, we can build more complex applications using the visible and update functions.
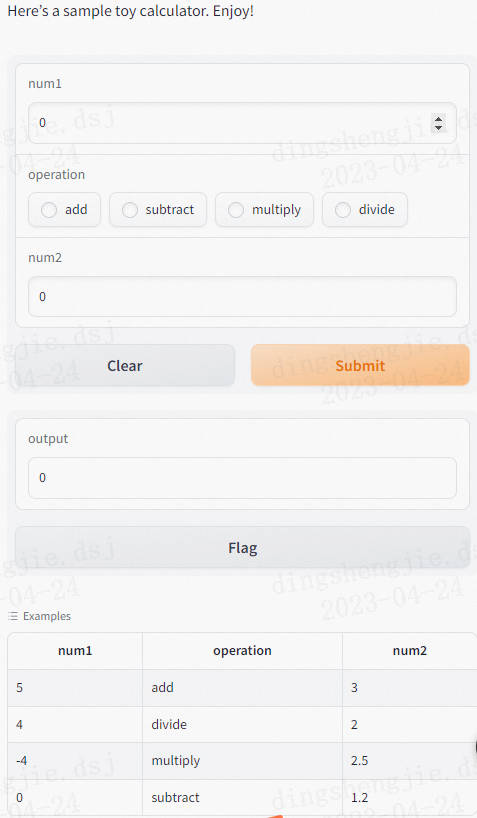
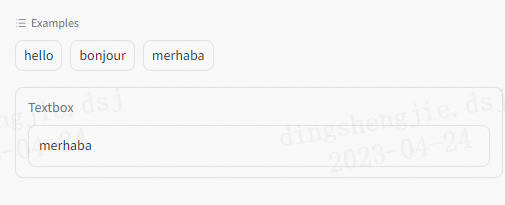
In some cases, you may want to define components before they are actually rendered in the UI. For example, you may want to display the example section using gr.examples above the corresponding gr.Textbox input. Since gr.Examples requires an input component object as a parameter, you need to define the input component first, and then define the gr.Examples object before rendering. The solution is to define gr.Textbox outside the gr.Blocks() scope and use the component’s .render() method at any location in the UI where you want to place it.
To get additional styling functionality, you can set inline CSS attributes to apply any style to the application. As shown below.

You can add HTML elements to any component. The corresponding CSS element can be selected using elem_id.
If your runtime environment is connected to the Internet, you can set the share parameter to True in the launch function. Once the program is run, the Gradio server will provide a URL like XXXXX.gradio.app. This URL can be accessed from other devices, such as smartphones or laptops. However, this link is only a proxy for your local server and does not store any data sent from your local application. The link is free during its validity period. The benefit is that you don’t need to set up your own server, but the downside is that it’s relatively slow, as the data passes through a third-party server.
To easily showcase our model app to partners, we can deploy the Gradio app to HuggingFace Space, which is completely free.
Here’s how to do it:
1. Register a HuggingFace account: https://huggingface.co/join
2. Create a project in the HuggingFace Space: https://huggingface.co/spaces
3. The project will include a `README.md` file. You can follow the instructions provided, or manually edit the `app.py` and `requirements.txt` files.。
By setting server_name='0.0.0.0' (indicating the use of the local IP address) and server_port (which can be left at its default value of 7860), you can share the application within your local network using your local IP address and the specified port.
Before the first access to the web page, you can set a username and password. For example, the auth parameter can be a tuple containing (username, password). In this mode, the queue function is not supported.
If you want to set more complex authentication settings, such as multiple user accounts or password hints, you can define custom validation rules using functions.
Although Gradio was initially designed to quickly build machine learning user interfaces, in practice, users can easily create a wide variety of practical tools by combining its various components.
Examples include: Data analysis dashboards, data annotation tools, or even small game interfaces.
In this example, we will use Gradio to build an image filter that selects some of our favorite cat emoticons from a collection of images crawled from Baidu.
扫码关注不迷路!!!
郑州升龙商业广场B座25层
service@iqiqiqi.cn

联系电话:187-0363-0315
联系电话:199-3777-5101